

Introduction
It may be a fair to assume that almost every development team uses git for version control and to collaborate on code. Incorporating git into your workflow for the first time can be quite daunting. Another related challenge is trying to get your head around rebasing. In this tutorial, we will learn a practical beginner’s workflow that utilises interactive rebasing.
Prerequisites
To follow along, you will need to have git installed. You can head to their website and download the version that suits your environment.
If you’re unfamiliar with vim commands, you can check out the little table of commands at the end of this article to get a small crash course.
Thoughts about pull requests
Before we dive into the meat of this walkthrough, let’s take a moment to talk about pull requests. I find it helpful to think about a pull request as if I were documenting a potion recipe that I’d like to eventually pass on to my future self.
Having this mental model helps me organise my commits to tell a coherent story. It helps me decide the sequence and composition of my commits.

Creating a new branch

Beginning a new task means we’ll need to create a new branch. At this point, we can pick our base branch. By default, our base branch would either be the main branch or the develop branch. Occasionally, we may choose another feature branch as our base. Regardless of the base branch we choose, we’ll want to make sure it’s up-to-date before creating our new branch.
For this example, we have decided to base our work off of develop. We can checkout develop and once we’re on develop, we can pull the latest changes:
| |
The --rebase and --autostash flags are a nice way to avoid conflicts when pulling changes. If you have uncommitted local changes, they are stashed before the rebase.
Once our chosen base branch has the latest changes, we can create our new branch:
| |
Writing commit messages

As we happily code away, we should remember to periodically commit our changes to avoid unexpectedly losing our work. It is a good idea to make small, but frequent, commits. It is also a good idea to group relevant changes under a commit message that is descriptive and applicable. Remember, these are messages we are writing for our future selves, so they should act as documentation.
Calling back to our potion analogy, our commit messages should read like simple instructions for a recipe or a to-do list. Some examples of commit messages could be:
- Add Posterity model
- Add Posterity controller
- Add migration for Posterity
- Add tests for Posterity
We can add and commit our changes by running the following commands and writing our message in the resulting editor:
| |
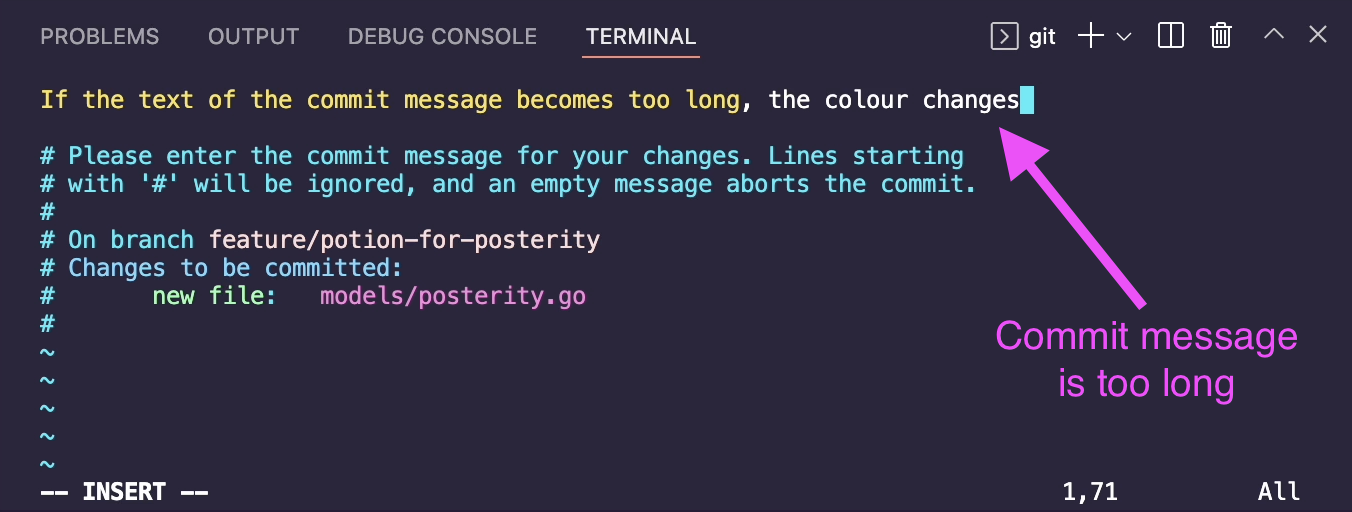
Git allows us to write our commit messages inline by using the -m flag. However, writing our commit message in the editor lets us see when our message has gotten too long. In the screenshot below, we can see that the commit message text has changed colour to let us know we’re exceeded the recommended character limit. There is no rule that requires us to adhere to this character limit, it’s just a personal preference.
Handling changes coming into the base branch

It is normal to have teammates merging their work into the base branch throughout the course of a work day, especially if the base branch is develop. To avoid potential conflicts later on, we’ll want to make sure we’re keeping up-to-date with the latest changes when we can. It is a good idea to periodically reset our base branch.
To do this, we can commit or stash the changes on our current branch. We can push these changes up to Github just to be extra safe. Once the changes are safe and out of the way, we can checkout our base branch and pull the latest changes. As a reminder, our base branch is develop for this example, but it can be any other arbitrary branch as well.
| |
Once our base branch has all the latest changes, we can switch back to our working branch and rebase against our base branch
| |
Interactive rebase
When we use rebase, we can think of it as resetting our base branch. Rebasing helps us keep our commit history clean. As we talked about in the beginning, a PR is a recipe for a potion we’d like to pass along to our future selves or to other developer friends. So it should read like documentation.
A rebase can be done manually or interactively. I personally find that having a visual guide is helpful, so I usually opt to use interactive rebase. In this section, we’ll walk though some scenarios where we may want to “rewrite history”. We won’t go over every single action, just the ones we’ll find ourselves using most frequently.
Squash
There will be cases where we may want to squash several commits together. For instance, we may find that we have a handful of small commits that don’t really tell a full story on their own and could work better as part of a single, larger, commit.
In the animated GIF example, below, we have 3 commits we would like to act on. So we can kick off an interactive rebase by running:
| |
Executing this will take us into the editor, where we can choose which commits we’d like to squash. We can mark a commit for squashing by changing the pick into a squash.
When we save (using :wq if your editor is vim), we are taken into another editor interface where we can choose the message we’d like to use for our newly combined commit. In the example, we’ve chosen to use the second commit message, so we delete all the other ones. Once we’re happy with the commit message, we can save and exit out of the editor.

Fixup
There are some cases where we’d like to combine commits and keep the message of the original commit. A fixup is similar to a squash, but we just use the commit message of the original commit and discard the messages from any commits marked for fixup.
In the animated GIF example, below, we want to combine the last two commits with the first one. This first commit can be thought of as the original commit we want to fuse the other commits into. We also want to keep the first commit’s message and discard the other messages. We’ve decided to consolidate these commits because all these commits are related to the model, and tell a richer story when they are combined.
We have 7 commits in total and we want to see our full list of commits. We can kick off an interactive rebase by running:
| |
Executing this command will take us to the editor. Here, we rearrange the commit history by moving the last two commits up to the second and third positions, then we can mark them for fixup by changing the pick into a fixup.
We remember to save and exit out of the editor (:wq). Finally we force push our changes to Github by running:
| |
Unlike a squash, we did not encounter the additional step to choose which commit message to use. We just used the message of the first (original) commit.
Reword
Sometimes we can make typos in our commit messages. Other times we can realise, later on, that our commit message does not accurately describe the changes we are adding. In such cases, we can reword our commit message.
In the animated example GIF, below, we are rewording the last commit message. Because we only need 1 commit (the last commit), we can start an interactive rebase with the following command:
| |
Executing this command will bring us to the editor where we can mark the commit for rewording. It should be noted that all these actions have a shorter version. In this case, we can replace pick with r. This works the same as if we were to use reword, r is the short form of reword.
When we save (using :wq if your editor is vim), we are taken into another editor interface where we can change the message of our commit. Then we can save, exit and force push our changes to Github.
| |

Edit
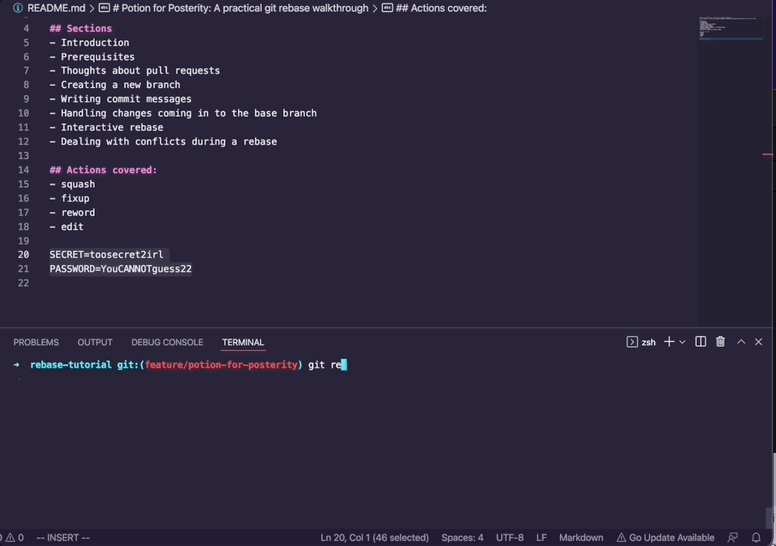
An edit will allow us to edit both the commit message and the contents of a commit. In the unfortunate situation where we have accidentally committed sensitive information like a password or a secret, we can use rebase to edit the commit.
In the animated GIF example, we realise that we’ve accidentally save secrets and password in our README. We’d like to pull up all our commits just as a sanity check. We can start an interactive rebase using this command:
| |
We are brought into the editor where we can see all our commits. We identify the commit that contains the secret password and mark it with edit. Once we save, the rebase process will be paused to give us a chance to go into our code and make the necessary changes.
We can remove the sensitive information, then add our changes and amend the previous commit.
| |
We can then ask the rebase process to continue by running:
| |
Lastly, we remember to force push our changes to Github. Our secret password has been successfully removed from our commit history
| |
Drop
Sometimes we realise that some commits just aren’t necessary. Perhaps we cherry-picked commits from another branch that have since become out-dated. Or we realise that we’ve added code that we don’t really need anymore. We can use a rebase to drop these commits.
In the animated GIF, below, we want to drop an unnecessary commit. Not only did we make a typo in the commit message, we realised that we no longer need these changes, altogether. We only want to act on the last commit, so we can start an interactive rebase using this command:
| |
We are transported into the editor where we can see the commit in question. We can mark it with drop. Once we save and exit the editor, that unnecessary commit no longer exists. We can force push our changes to Github.
| |
A small tip about discarding changes

Sometimes we’re just experimenting and trying stuff out, so we may not necessarily want to keep all the changes we made. In situations like that, we can discard them all by running:
| |
Some vim commands used in this guide
When rebasing, we spend a lot of time in the editor. If your default editor is vim, here are some of the commands we use frequently throughout this guide:
| Command | Description |
|---|---|
i | To enter INSERT mode. This is the vim mode that allows us to type or insert text. |
| esc or control + c | Exits from INSERT mode and takes us back to NORMAL mode. NORMAL mode is where we can run commands or navigate around the editor with h, j, k, l and other navigational commands. |
:wq | This command will save our work (w) and exit vim (q). Commands are executed in NORMAL mode and start with a colon (:) |
:q! | Hard quit without saving anything. The exclamation point (!) is like a force flag. |
Going further
If you’d like to continue learning about git and rebase, you can consider doing the following
- read up on the differences between merging and rebasing
- spin up a little repository and play around with the actions we covered, or
- spin up a demo repository and try all the other actions we did not cover
Conclusion
In this tutorial we learnt how to use git rebase --interactive to squash, fixup, reword, edit and drop commits. We saw how these actions can improve our git workflow by helping keep our commit history clean and allowing us to tell a coherent story in our pull request.
Congratulations, you did great! Keep learning and keep coding. Bye for now, <3