

This is part of a series of articles. Read the other parts here:
- Build a REST API from scratch with Go, Docker & Postgres
- Build a fullstack app with Go Fiber, Docker, and Postgres
- Create a CRUD app with Go Fiber, docker, and Postgres
Introduction
In this tutorial, we will learn how to create a simple trivia REST API from scratch, using Go and Docker. We will start with an empty folder and build on it as we go. We won’t need to have Go installed on our machine beforehand, which is arguably the biggest benefit of this approach. At the end of the tutorial, we will have a little Go Fiber app connected to a Postgres database.
Prerequisites
To follow along, you will need to have Docker installed. You can head to their download page to find the version that suits your environment.
Creating a new project
In the terminal, we can change into the directory where our projects are stored. In my case this would be the Sites folder, it may be different for you. Then create a new directory for our REST API project. Then we can immediately change into this new directory
| |
Getting started with Docker
Our project folder is currently empty. Since we’re using Docker to create an app from scratch, the first file we will add is the Dockerfile. Then we will also add a docker-compose.yml file because we will need to manage multiple containers.
| |
Dockerfile
First we will look at the Dockerfile.
To begin, we want to start building our own container FROM the official golang image. And we want to use a specific version of the image. In this tutorial, we will use version 1.19.0. Specifying the version will ensure all our dev environments are the same. Think of this step like we’re installing Go onto our machine.
The only other thing we will do in this step is to specify our working directory. Docker containers run on Linux, so here we’re saying that we want our app to live in the /usr/src directory of the Linux filesystem in a project folder we want to be named app.
| |
We will continue building on our Dockerfile, but this is good enough to get us started. Let’s move on to our initial docker-compose.yml configuration.
docker-compose.yml
If our app required only one service, we would be able to make do with having just the Dockerfile above. However, we’re eventually going to add a Postgres service as well. So it would be handy to have a docker-compose.yml file to help us manage our container collection.
We’re starting off with a web service. We’ve called it web because this is the container where we will have our Go Fiber web app. Below is a brief explanation of each of the fields:
| Field name | Description |
|---|---|
build | This is the path to the Dockerfile for the service. We use . because the Dockerfile for our web service can be found in the same folder as our docker-compose.yml file. |
ports | This is were we map the port from the container with our host computer. Our web service will be running on port 3000. |
volumes | Volumes are used to persist data generated by the service. We want to persist our web service data inside our project directory, i.e. /usr/src/app. |
| |
And with that, we can head into our terminal and run our app using the following command:
| |
Because it’s our first time running our service, this command will pull the images we need. You will notice that the logs in our console correspond with the commands in our Dockerfile. Let’s kill our container now and go have a little look inside.
We can enter our container by running the following command. Here we’re saying we want to open the bash within our web service:
| |
Now inside our container, we can run commands like any other terminal. Let’s check our Go version:
| |
We’ve successfully put together the most basic Docker setup needed to start developing with Go. In the next part of the tutorial, we will install the Go Fiber framework.
Dockerfile vs. docker-compose
Before we go any further, let’s take a little detour to briefly discuss why we have both a Dockerfile and a docker-compose.yml file.
A Dockerfile is a set of commands that will be run to set up a container. Sometimes, it can help to think of it as the list of commands you’d need to run when setting up a brand new computer for development in a particular technology. In the case of this particular tutorial, we can think of it as the list of commands we’d need to run in order to set up a brand new computer for Go development. A project can have one or more Dockerfiles.
The docker-compose.yml file is a configuration file that will allow us to manage all our different containers. As we mentioned above, a project can have one or more Dockerfiles, which means it can be made up of one or more containers. The docker-compose.yml file can be thought of as a single project manager for all these containers.
Installing Go Fiber
Now that we have a functioning containerised Go environment, we can start installing the necessary packages inside it. We’ve decided that Go Fiber will be our framework of choice, however, you can install other packages in much same way.
Using the following command, we can enter the container for our web service:
| |
Before we start installing all the packages, we’ll need to initialise Go Modules to manage our dependencies.
It is usually a good idea to name your project using the URL where it can be downloaded. I will use my Github repo URL as the name of my project. But please feel free to substitute the following command with your own Github or website
| |
With Go Modules set up, we can now install the Go Fiber framework:
| |
Hello World
Go Fiber provides a Hello World example in their docs. We can use that as a starting point for our own app. While we’re still in the container, let’s create our cmd folder and our main.go file:
| |
Then we can add the example code to our cmd/main.go file. We’ve modified the string, but the rest of the code is the same as the example from the Go Fiber docs
| |
Still in the container, we can start our Go Fiber web server using the go run command and binding to localhost
| |
We can visit http://localhost:3000/ in the browser to see our app running and our printed-out string.
Starting your app from host machine
At the moment, every time we want to start our gofiber app, we need to enter our web service container to run the command. It would be nice if we could just run our dockerised app from our host machine.
We will need to make a few changes to our Dockerfile and docker-compose.yml files to achieve this.
Updating Dockerfile
In our Dockerfile, we will add 2 new lines. First, we will use the COPY instruction to copy all the files into the container’s working directory. Then we will run the command go mod tidy to install and clean up our dependencies
| |
docker-compose.yml
In our docker-compose.yml configuration, we just need to add the command we want to map to docker compose up. You may notice that it is the same command we use inside the web service container
| |
If our container is still running, we can shut it down. Then in our terminal, we can now run our app using the following command:
| |
We can head to our browser to see that our app is running. Now let’s update our cmd/main.go file. When we refresh the browser, our changes aren’t reflected. This is because we’ll need to rebuild our app first before we can see the changes.
Hot reloading
It would be great if we had a mechanism to rebuild our app whenever we made changes to the code. We can use a package called air to help us achieve this.
We’ll want to install it as part of our docker setup, so let’s open up our Dockerfile again and add a RUN instruction to install the air package.
Your Dockerfile should now look like this:
| |
Add .air.toml
We also need to add a configuration file for the air package. First we can create a new dotfile called .air.toml
| |
Then we can head to the air package’s Github repo to copy the sample config file from there. We will only need to change the command under [build] so that it is pointing to our cmd directory. This is where our main.go file lives.
| |
Update command in docker-compose.yml
Then we have to change the command in our docker-compose.yml file so that it uses the air to run our app.
Our web service in the docker-compose.yml file should currently look like this:
| |
Now rebuild our container
| |
And run the app
| |
Now if we make changes to the cmd/main.go file, we can refresh our browser and see our changes.
Environment variables
It is good practice to keep all our sensitive keys in a .env file rather than checking them in to version control. We can use docker-compose.yml file to read in our environment variables without installing any additional packages. Under the web service config, we can add the env_file key and point it to our .env file
| |
You may have noticed that this file does not exist yet, so let’s create it in your project’s root directory:
| |
And that’s all we need in order to use environment variables.
Adding Postgres
In the next few sections of the tutorial, we will be setting up Postgres as our database of choice. We will have to set up a second service for it, so let’s head straight back into our docker-compose.yml file and add a new db: key under services.
| |
Then under this db: key, we’ll have to add a few more fields
| Field name | Description |
|---|---|
image | We will use the postgres:alpine image that is available directly from docker hub. Since we won’t be adding any additional instructions, we don’t need an accompanying standalone Dockerfile for the db service. |
ports | This is where we map the port from the container with our host computer. Our db service will be running on port 5432, which is the usual port for Postrgres. |
volumes | Volumes are used to persist data generated by the service. We want to persist our db service in postgres-db:/var/lib/postgresql/data. |
| |
Named volumes
You may have noticed that we have added another volumes key, with an empty postgres-db field, on a line of its own. We then used postgres-db in our db service config. This type of volumes config is know as a named volume.
Named volumes persist data even after a container is restarted or removed. The data here will also be accessible to other containers. The path to the actual volume is handled by docker internals. Volumes that are defined in this way would need to be removed manually.
This makes sense for a database because we’d, ideally, like to persist our data even after we’ve shut down everything and gone to bed.
Database credentials
In the next step of our Postgres-related work, we need to store our database credentials (i.e. DB_USER, DB_PASSWORD and DB_NAME somewhere safe. We don’t want to be pushing these values into our version control, so let’s keep them in the .env file
| |
And now we can access them in our docker-compose.yml file:
| |
Now that we’ve configured our db service to use Postgres, we need to start communicating with it.
Communicating with the database using GORM
For a small app, we could get away with using vanilla SQL queries to communicate with our database. However, for the purposes of learning more about using “models” to represent database entities, let’s use an ORM library called GORM.
ORM or Object Relational Mapping is a technique that will allow us to query and manipulate data from a database in an object-oriented way. In our case, Go structs will be the “objects” that represent our database entities.
To install GORM, we will enter our web service container
| |
And run the following command
| |
While we’re here, we should also install the postgres driver for GORM
| |
Now we’re ready to start setting up a GORM model.
GORM model
As we mentioned in the introduction to this tutorial, we are building a trivia app. So we’ll have to stores Facts in our database within a table of the same name (i.e. a facts table). We will create a Go struct to represent our Facts and then we’ll use GORM to translate our struct into a database entity.
First, let’s create a models folder in our project root directory. This is where we will store our GORM models
| |
And let’s add a models.go file to the models folder
| |
Inside models/models.go, let’s add our Fact model. A Fact will have a Question, which will be of type string and an Answer, which will also be of type string. At the very top of the struct body, we’ll indicate that it is a gorm.Model. So we should also make sure we’re importing the gorm package
| |
Struct tags
Struct tags are small pieces of metadata attached to fields of a struct. They are used to provide instructions to other Go code, communicating how to work with the struct fields.
In the following snippet, we’re using the json keyword in our struct tags to describe the corresponding JSON keys we’d like to associate to each field of the struct.
Any of our Go code that works with JSON will see these struct tags and understand that:
- the
Questionfield is represented by thequestionkey in JSON, and - the
Answerfield is represented by theanswerkey in JSON
JSON keys follow some naming conventions. For instance, JSON keys are usually lowercase and may also be snake_case in some cases. This is why we will often see this sort of “mapping” in codebases that use a lot of JSON, e.g. APIs and web apps.
| |
Now let’s also add some struct tags for GORM to use. We will use the gorm keyword to specify some initial database rules for each field.
We’re telling GORM the following:
- In the database, both the
questionandanswercolumns will be of typeTEXT - In the database, neither column should be allowed to have
NULLvalues - We also set the default value for each column to
NULLso that we can return an error if the user does not provide their own values when they create a newFact
| |
Pay attention to the syntax of the struct tag. We can use more than one keyword type within the same struct tag, but everything is encapsulated between backticks.
Now we’re ready to move on and make a database connection.
Create a database connection
We need to open a connection to the database so that we can read and write new Facts. Let’s start by creating a new database directory
| |
And within the database directory, we’ll create a new file
| |
Inside database/database.go file, we indicate that this file belongs to the database package. Then we import the GORM package and set up a custom struct type called Dbinstance to represent our database instance.
We will also create a new package-level variable to hold our global database. This variable will have the name of DB with a type of Dbinstance. We put this on the package level because we need to access it everywhere in our app.
| |
Now let’s create a function called ConnectDb(). As the name implies, this is the function we will use to connect our app to the database.
| |
Inside the body of ConnectDb(), we will use a GORM method called Open(). gorm.Open() takes 2 arguments. The first argument is of type gorm.Dialector and the second argument is of type gorm.Options
| |
First argument: gorm_dialector
Let’s start putting together what we need for the first argument, which is the dialector. Since we’re using postgres, we need to import the driver package.
Then we will call the postgres.Open() method which takes one argument, which is a DSN (data source name) string.
To construct the DSN string, we need to import the fmt and os packages. We will use the os.Getenv method to access the environment variables we had set up in our docker-compose.yml file earlier. And we will use the fmt.Sprintf() method to interpolate the string with the relevant variables.
| |
Second argument: gorm_options
The second argument to gorm.Open is a GORM config object. In our config, we set the kind of logger we want to use. We should also remember to import the gorm/logger package
| |
The gorm.Open() method returns a database and an error. So let’s do some quick error handling before we move on.
If we get an error here, we want to log a fatal error and exit. If the database can’t connect, it’s a bit of a non-starter, so I think it’s okay to use log.Fatal() here. We also exit with the exit code of 2, because our operation did not complete successfully.
| |
But if there are no errors, we log a message that says we are connected and we set the Logger value for our db
| |
Next we want to use AutoMigrate to create the tables that we need. We pass all our GORM models to AutoMigrate. In this tutorial, we only have one GORM model, which is the Facts model.
| |
Lastly, we set the value of our global DB variable to the database we just set up.
| |
We will open the database connection in func main() so that the database is accessible throughout the app:
| |
Routes & Endpoints
Our app is now able to connect to our database. Now we can move on and set up some endpoints.
To set up our first endpoint, we can head into out cmd/main.go file. Here, we can call the setupRoutes() function right after where our new gofiber app is created.
| |
This setupRoutes() function doesn’t exist yet, so let’s create it now. We can put this function in its own file, but it will belong to the main package. Let’s create a new file to hold all our routes
| |
We can move our existing routes into cmd/routes.go, and clean up the cmd/main.go file
| |
| |
We can further clean this up by moving the handler code into a separate package.
Handler: home
To keep things organised, we can make a new handlers folder to hold the handler code
| |
Then create a new file for all the handlers that are related to facts
| |
We can move our existing handler into handlers/facts.go
| |
Our routes.go file should look like this:
| |
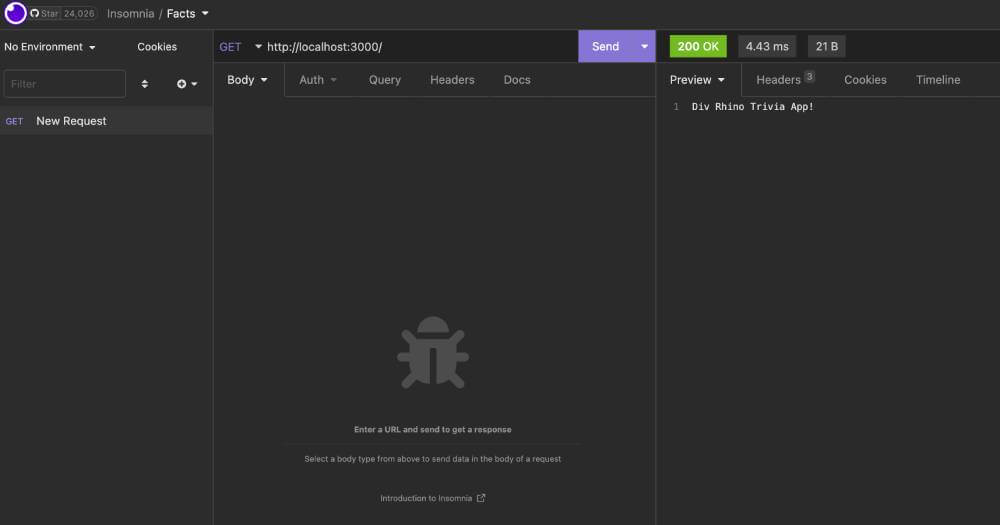
Now let’s open our API client to test this home route. We are using Insomnia in this tutorial, but you can use your client of choice. We should see our string in the response
Creating Facts
Now that we understand how to set up endpoints, let’s go ahead and add an endpoint that we can use to create new facts. It will make a POST request
| |
The handlers.CreateFact handler doesn’t exist yet, so let’s create that now:
| |
Use Insomnia to test this endpoint

Listing Facts
Now that we can create new facts, we should also have a way to list all our facts. Let’s update the home route and adapt it to ListFacts
| |
Then let’s also change the home handler to be ListFacts
| |
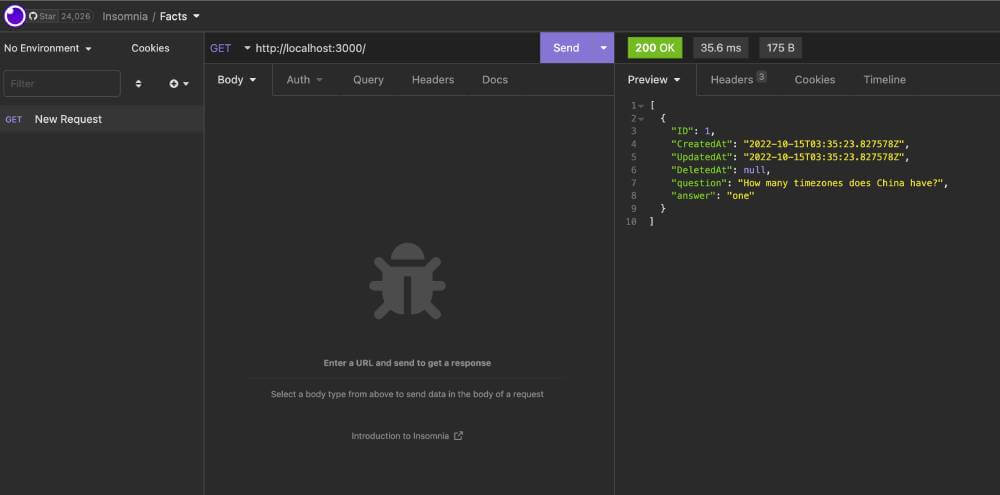
We can use Insomnia get a list of all our facts. Currently we only have one. Let’s add a few more and get the list with all the new facts.
Conclusion
And there you have it. In this tutorial we learnt how to create a simple trivia app from scratch using Go and Docker. We started with a blank folder and worked our way up to creating a multi-container app with a Postgres database. The finished code for this project can be found in the Github repository.
Congratulations, you did great! Keep learning and keep coding. Bye for now, <3